If you’re an accomplished baker, skip to the end for the short version. If you are a beginning baker, make sure you look at Basics of Baking Sourdough Bread (Part 1)
Fine bread can be made with flour, water, salt and yeast. And if you use a sourdough starter you can skip the yeast (because it is in the starter). And since the starter is made with just flour and water, that means fine bread can be made with just three ingredients. Flour, water and salt! Hence, the wonderful bread baking book, Flour Water Salt Yeast, by Ken Forkish. I highly recommend that book by the way. I also highly recommend Tartine Bread, by Chad Robertson. His book contains only sourdough breads whereas FWSY contains wonderful commercial yeast breads in addition to sourdough.
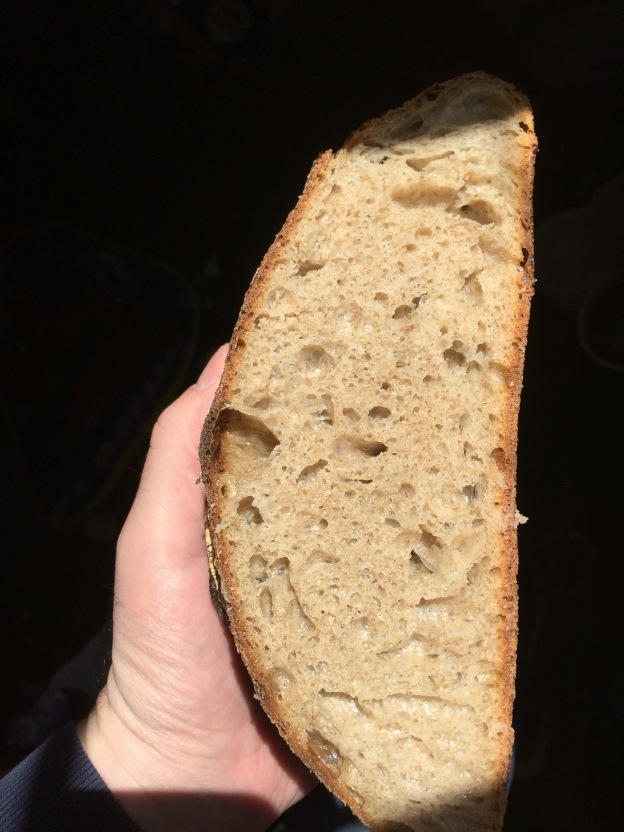
In this post, I am writing about a phenomenal sourdough rye bread, that doesn’t taste sour and doesn’t taste like Arnold Jewish Rye (because it does not contain caraway seeds, which give that flavor many associate with rye.) Please note, however, that I do not recommend this particular formulation for a beginner, as the dough is wet, sticky and difficult to handle. If you are just starting out, this would feel like learning origami with fly-paper, and would only frustrate you.
I grind my rye flour and whole wheat flour using wheat berries, rye berries and my Komo Grain Mill (reviewish). You can also grind flour in a high speed blender. And, of course, you can buy whole grain flours too. I prefer to mill my flour as needed, and like the idea of never having to worry about my flour going bad. (Note, if you associate whole wheat flour with bitter baked goods, that is because you have eaten foods made with rancid flour. Buy fresher flour and store in the fridge to prevent it from going bad, as whole grain flour spoils quickly.)
For white all purpose flour, I have always used King Arthur All Purpose Flour (organic or not). I have never tried bread flour.
The Levain
Levain is what is used to raise the bread. It is sourdough starter fed with flour and water, and given sufficient time to rise and aerate. (Technically, given sufficient time to grow the yeast and bacteria needed to make the well-proofed and fermented loaf.)
In a bowl, add 200 grams of water and 1 TBSP of active starter (That comes to about 18-20 grams). If making 2 loaves rather than four, you may halve these quantities)

Disperse the starter in the water, then mix in 100 grams all purpose and 100 grams whole wheat flour. It’ll look like the below photo when mixed.
 I cover the bowl with a shower cap and leave it on the counter overnight. The next morning, it will likely be ready to go if it has some bubbles breaking the surface. If you carefully spoon some out and it floats in a bowl of water, it is definitely ready to use. If it doesn’t float, give it more time in a warmer spot and try again in an hour. For this bake, I put the levain in the fridge at 630am because I wasn’t going to use it until later in the day. If I left it out all day, it would over-ferment and not make as fine a bread. Here is the levain after an overnight stay on the counter, before going in the fridge (because I was not going to use it until the evening). Based on its appearance, I believe it was ready to use. Sticking it in the fridge slows things down and lengthened the time it could be used.
 Mixing the Final Dough (adding the water, levain and salt)
Next, you have the option to EITHER disperse the levain in water, and then mix with the flour and let it rest for 30-40 minutes before adding the salt OR mix the water and the flour and let the resulting dough hydrate for 30 minutes to 24 hours, before incorporating the levain and salt. The flexibility of breaking up the work this way can be very convenient if you have a busy schedule.
For this bake, I was not home in the early morning, so I let the dough hydrate from 10:45 am to 5:00 pm before adding the levain and salt.
The dough itself can sit on the counter in a covered container.
I mixed the dough in a Cambro 12 Quart round container. These containers are great because they are easy to keep clean (let the wet bits dry out overnight and then scrape them out into the trash before cleaning), and they make it easy to mix the dough without making a mess. I also “turn” the dough right in the container, so I don’t have to keep my counters clear all day.
I used a Danish Dough Whisk initially, but ultimatley you need to get in there with a wet hand to incorporate all the flour. Using a wet hand lessens the sticking to the hand. I don’t know that I’d buy one of those whisks again if I had it to do over again. It excels at mixing pancake batter but with a heavy dough, your hand makes a better and cheaper mixer.
First I combine the flours:

Then I add the water and get stirring. You will eventually need to use your hands so you might as well start out doing so. However, feel free to use a whisk or wooden spoon until you have to get your hands dirty. 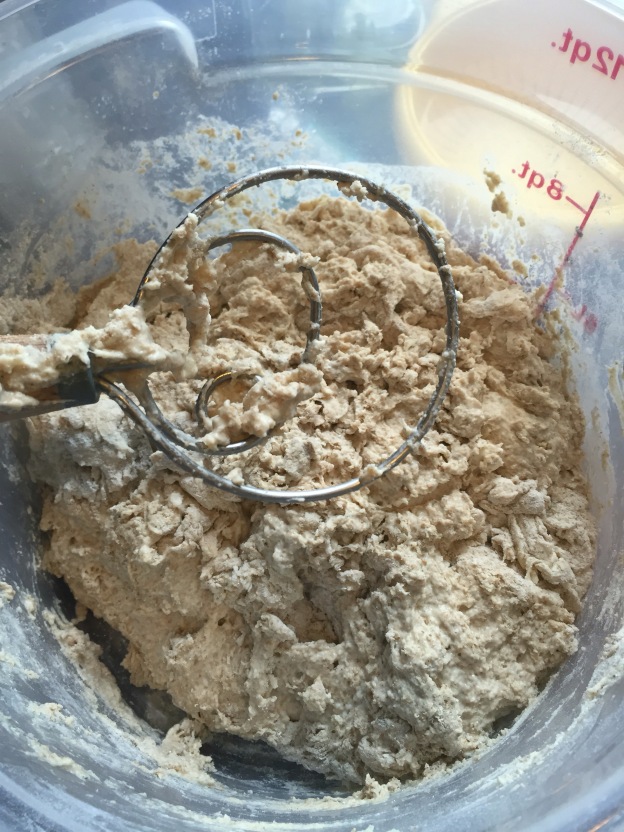 There is still a lot of dry flour under this mass which is why I have to go in with my hands. Even with wet hands, this stuff sticks.
 (Use a flexible dough scraper or rubber spatula to get this off your hands)
Here is the dough well-mixed. Allow it to hydrate without salt (autolyse) for at least 30 minutes. 
I put the lid on and the salt on top of the lid, so I don’t forget to add it later. 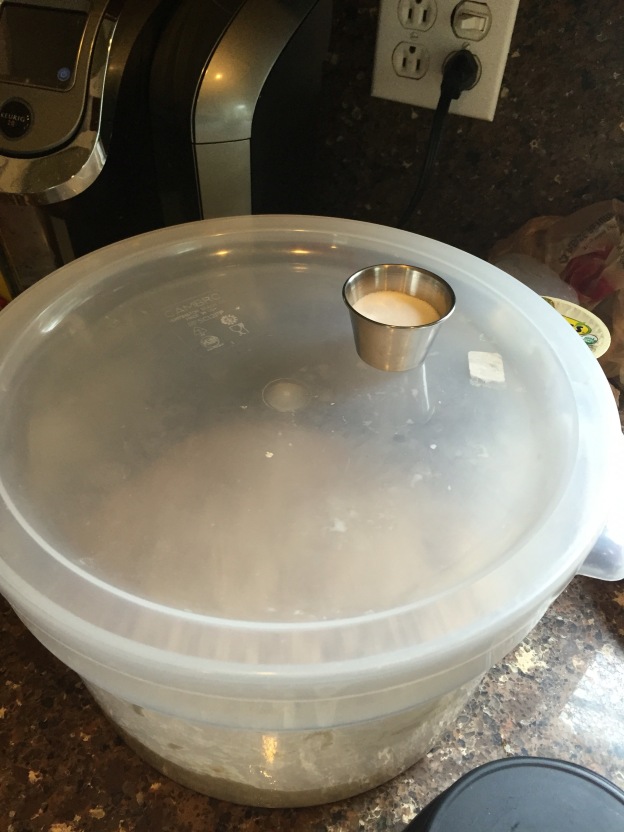
Next, sprinkle the salt onto the dough and added the levain straight from the fridge.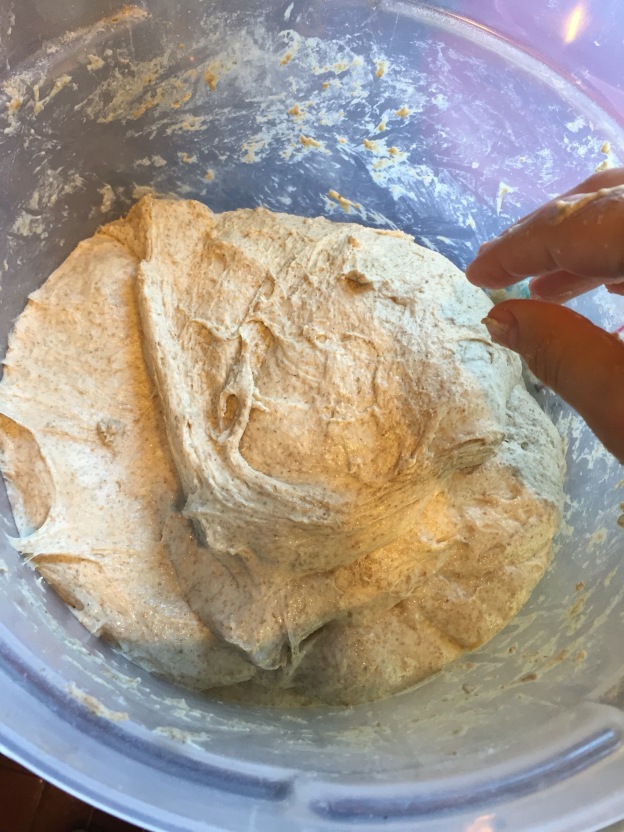
I pinch the dough a bunch of times, fold it several times, pinch again, fold it again and repeat until the salt and levain are incorporated.  I then let the dough rest 20 minutes before beginning the stretch an folds every 30 minutes for two hours.
With one wet hand, I reach in underneath and pull up half the dough and lift it up to stretch and pull it across. Then turn the bowl or bucket a quarter turn and reach in and do it again. Repeat a total of four times and let the dough rest covered until the next turn. 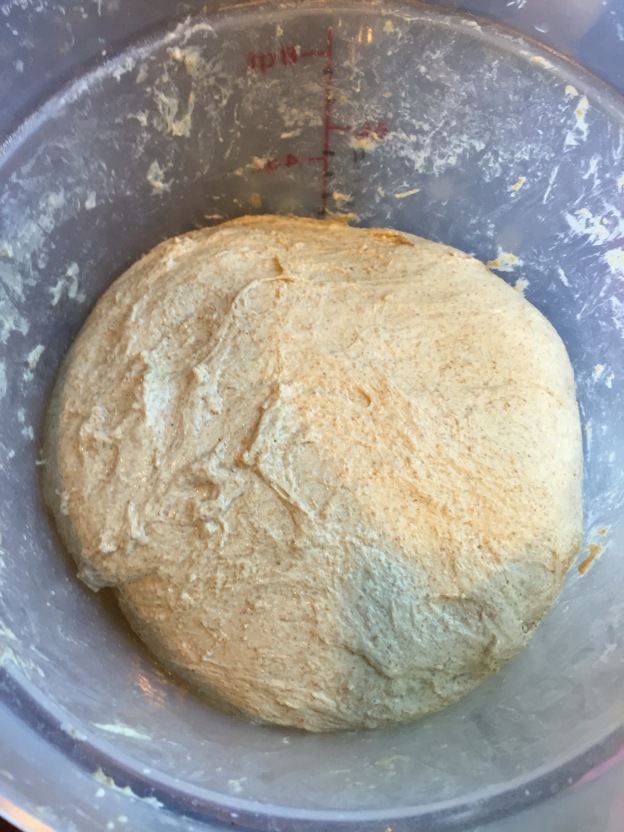
Here is a video of the second stretch and fold.
Here it is before the third turn. 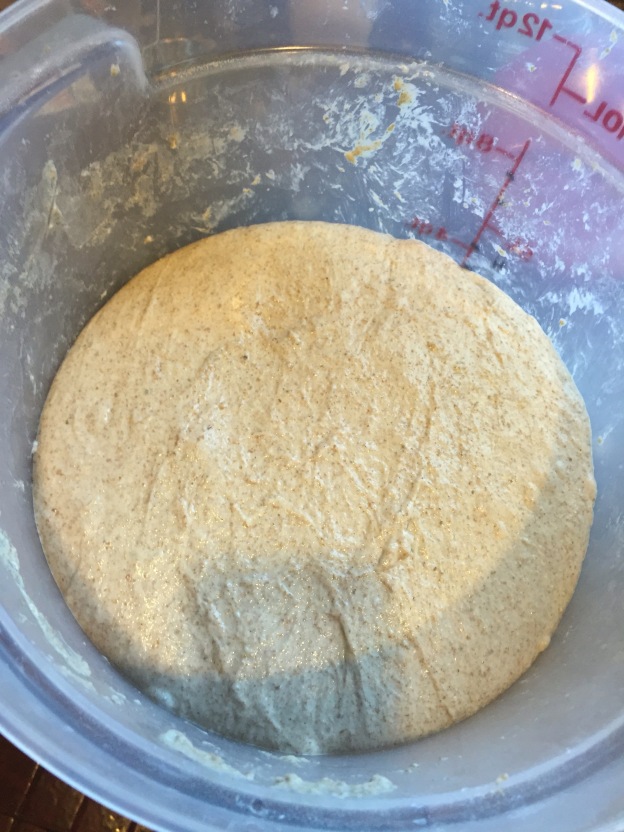
And after the third turn. You can see it is starting to hold its shape in the bucket.
Before the fourth turn: 
And after the fourth turn. 
Now we wait one hour until the fifth turn, and then another hour before taking the dough out to preshape. It looks like this after the final hour:


I use a flexible dough scraper to remove the dough and put it on the clean counter, no flour. 
Flour the top of the dough. The top will be the outside of the loaf and the flour will help keep it from sticking while you shape it. Flour your hands too. This dough is nearly impossible for a beginner to make because it is so hard to handle. That stainless canister is where I keep my bench flour.
Divide in four, pre-shape into rounds and cover. I use these large flour sack dish towels to cover my dough. Sometimes I use them to line my baskets if I don’t want the “rings” around the bread, or if the dough is particularly sticky.
After a 20 minute rest, a final shaping. I sprinkle more flour on top. Once all of the loaves are shaped, I pick them up with the bench scraper and one hand, and gently place them in the basket, seam side up. Note: do not shape and put in the basket immediately after shaping. Let it sit on the counter for a couple of minutes to allow the seam to seal better.
Once all of the loaves are shaped, I pick them up with the bench scraper and one hand, and gently place them in the basket, seam side up. I sprinkle some more flour on top, cover with my flour sack dish towels and place them in the fridge overnight. You can buy the baskets online at amazon but they are a lot less expensive at lucky clover trading. You will be happy with an 8, 8.5 or 10 inch basket. I’d suggest the 8 or 8.5 round. Lucky clover does not always carry the round baskets. Here you see me using the larger and smaller baskets because I did not divide the dough evenly.
The next morning they are ready to bake. I apparently had the basket tilted in the small fridge which made the dough lopsided. I had to pull some dough away from the basket and let it resettle. 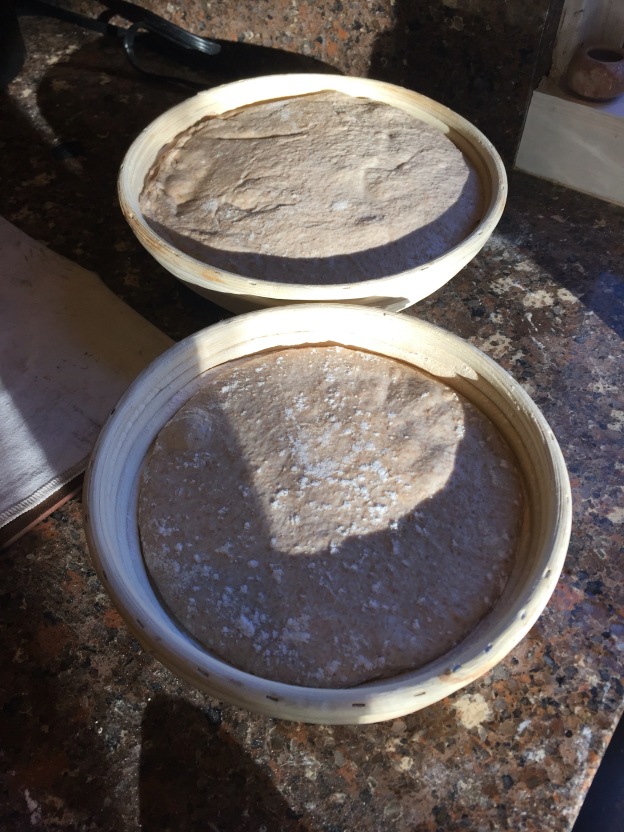
I bake in the lodge combo cooker. I have seen this range in price from $34 to $45. I finally broke down and bought two of them so I can bake two loaves at a time. I preheat the oven with combo cookers in the oven until the oven hits 500. I turn the dough out onto the EXO Super Peal for scoring (use whatever method you like. I use a lame). I then remove the combo cookers (one at a time) and peel the dough into the shallow pan of the hot combo cooker. (You can probably do this right onto parchment paper and carry the dough onto the hot pan, removing the paper for the second half of the bake.) Load the dough into the oven and drop the temperature to 450. Bake covered for 20 minutes. Then remove the deep lid and nest the shallow pan (the one with the bread) in the deeper pan. This will help insulate the bread and keep it from burning on the bottom.
Here the combo cookers are heating up. Shallow pan is on top because after I score the dough, I grab only the shallow pan, close the oven, put the dough in it and then open the oven and cover with the deeper pan. You’re going to want a pair of heat resistant gloves. I prefer the longer ones because I want more protection for my arms in case I touch the hot oven. I use these.

After twenty minutes I open the oven, reverse the pans (this acts to insulate the bottom of the bread and also keeps the room free of burning hot cast iron).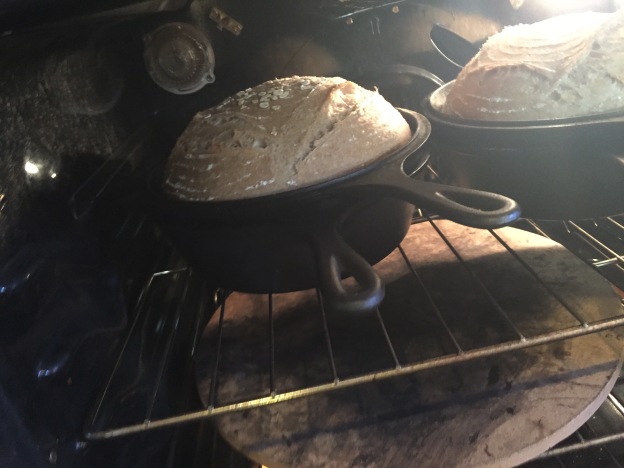
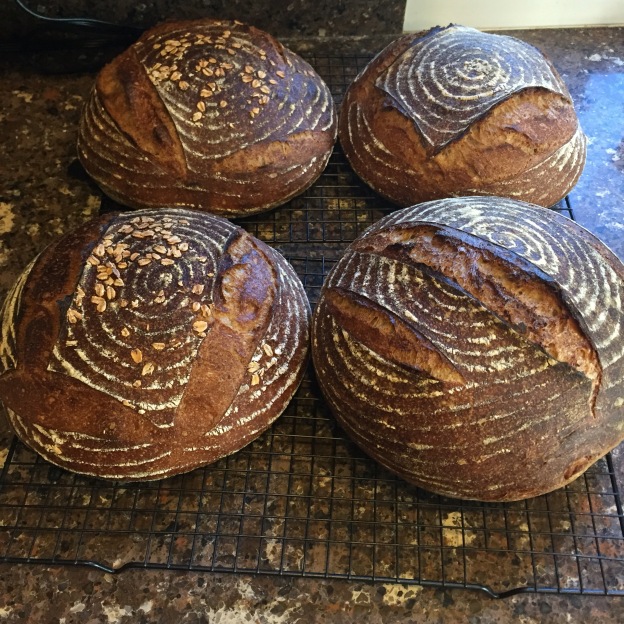
Bake for another 20-25 minutes. I always bake for the 25 so I get a nice crisp crust.  Remove the bread from the hot pan and place on a wire rack to cool. Now the hard part. Wait at least an hour, preferably two, before cutting! If you cut too soon, the bread will be gummy. It is actually still baking while it cools so let it do finish.
 Here is the bottom of the bread.

The overall “formula” for this bread including the Levain is as follows:
64% All Purpose Flour (King Arthur)
27% Whole Wheat Flour
9% Whole Rye Flour
2% Salt
1% wheat germ (totally optional. I had it and wanted to use it)
82% Hydration
The “short” directions for making four loaves follow — to make 2 loaves, halve everything.
Levain
1 T starter (fed the morning before)
100 g water
100 g AP Flour
100 g Whole Wheat Flour.
Dough
All of the Levain
1600 grams water
1200 grams all purpose flour
600 grams whole wheat flour
200 grams whole rye flour
20 grams wheat germ
40 grams salt
Make the levain the evening before. The next morning, combine levain with water and pour the water into a large bowl containing all of the flours and wheat germ. Allow to sit for 40 minutes and then add the salt. Do four sets of stretch and folds over the course of two hours. Do a fifth set at the third hour. After the fourth hour, divide the dough, pre-shape and leave covered for 20 minutes. Then shape the dough, place in baskets and bake after four hours or so (assuming temperatures of 72 degrees) or stick in the fridge and bake the next day.


